From Hard Drives to Handcuffs: My Digital Forensics Case Study
Introduction
When I enrolled in my master’s program in Cyber Security, I knew digital forensics would be an exciting module. But I never imagined that I’d get the chance to play detective in a simulated criminal case. My task? To analyze digital evidence and determine whether a suspect was guilty of assault. Spoiler alert: Hard drives don’t lie.
The Case: Rex v Djanko
The case centered around an assault that took place near the Degree Apprenticeship Centre at the University of Warwick. The victim, Stuart Tchaikomsiva, accused the suspect, Paul Djanko, of attacking him. Djanko, however, had other ideas: he claimed he had never met the victim, never spoken to him, and was in Leicester at the time of the crime.
A bold claim, considering that his digital footprints were practically screaming otherwise.
The Investigation: Pixels Don’t Forget
Armed with a suspect’s hard drive and dash-cam footage, I embarked on my forensic journey. My goal was simple: find the truth hidden within the bytes and bits of Djanko’s digital life.
Step 1: Verifying the Evidence
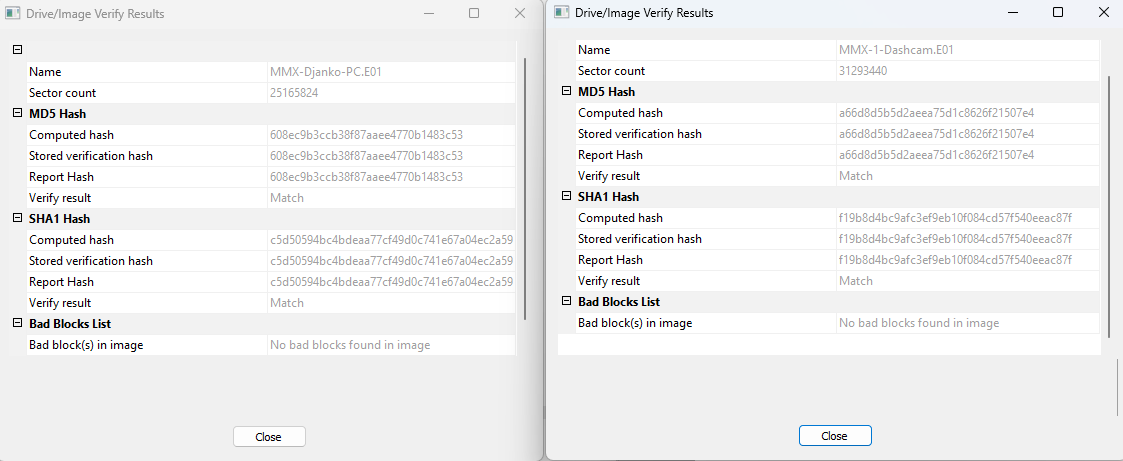
Before diving in, I had to ensure that the evidence had been handled correctly. Using FTK Imager, I verified the forensic images of the suspect’s hard drive and dash-cam. Hash values confirmed the data’s integrity—no tampering, no funny business.
Step 2: The Emails That Tell a Different Story
Next, I sifted through Djanko’s emails using Autopsy. And there it was—an email exchange between the suspect and the victim. Not only had they communicated, but the discussion revolved around drug drops.

This not only proved that the two knew each other but also introduced a new dimension to the case: drug-related activities.
Step 3: Geo-Location Tells the Tale
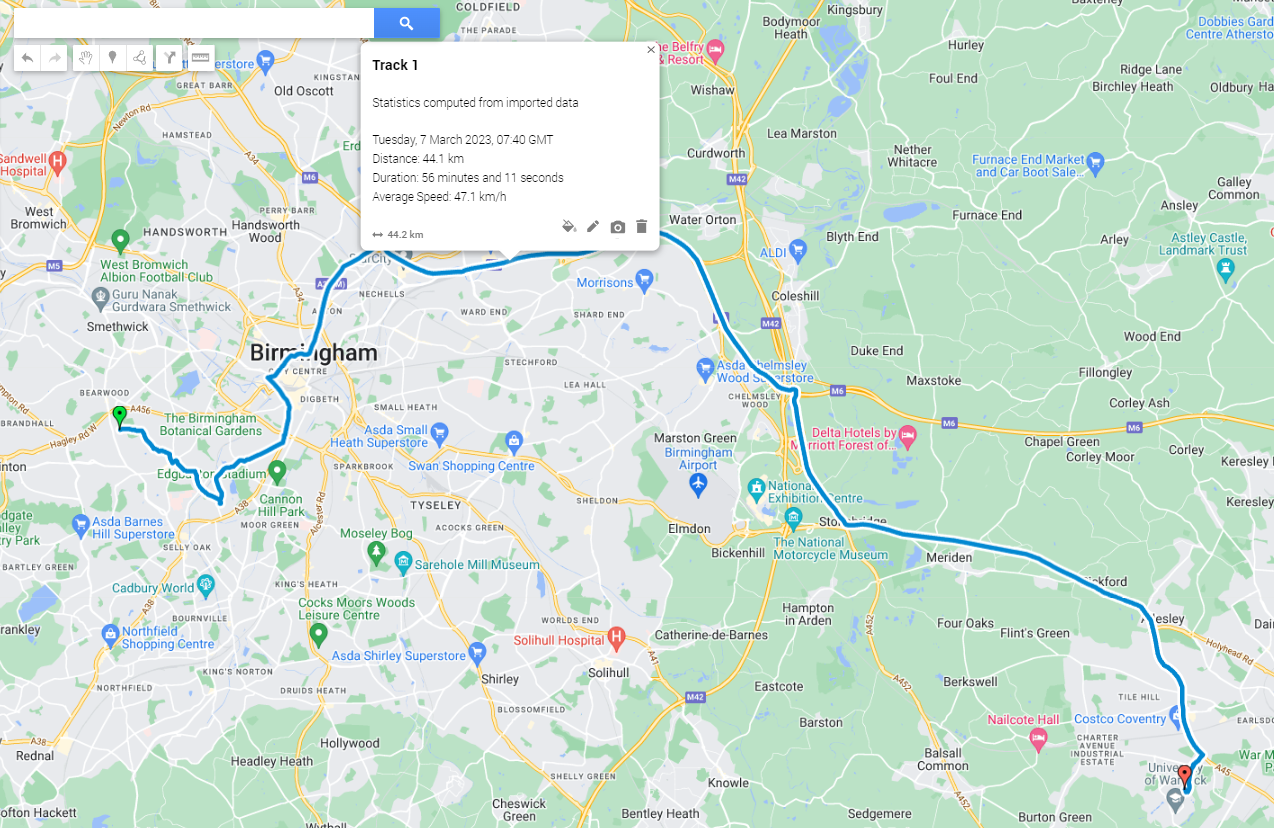
The dash-cam data was next. Using ExifTool and GPXSee, I extracted geolocation data from the footage. Djanko’s claim of being in Leicester all day? Debunked. His vehicle was parked near the crime scene just hours before the assault took place.
Step 4: The Smoking Gun (or Car?)
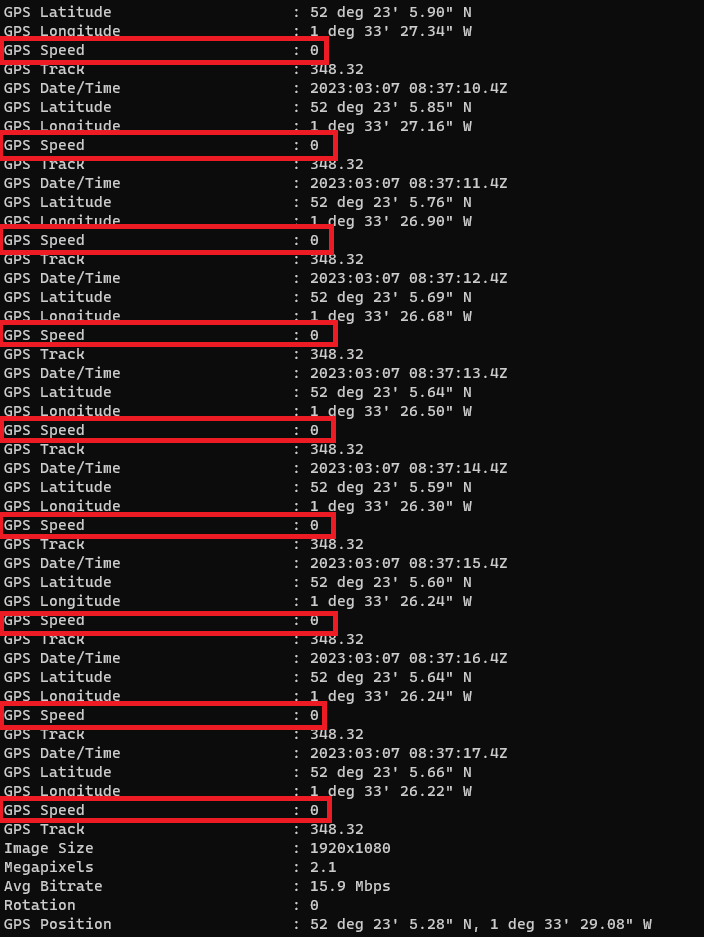
While analyzing the dash-cam video, I found discrepancies in the metadata. The footage indicated that the car had stopped, but the GPS data showed slight movement. A deeper dive revealed that the car had been idling near the Degree Apprenticeship Centre for an extended period.
The Verdict: Digital Truths vs. Human Lies
The digital evidence stacked up against Djanko:
- Email communication proved he knew the victim.
- Dash-cam data placed him at the crime scene.
- His statements were inconsistent with the forensic findings.
Though my findings couldn’t prove that he committed the assault, they painted a clear picture: Djanko was lying. And in digital forensics, lies unravel pretty quickly.
Tools and Technologies Used
This case exposed me to a wide range of digital forensics tools and technologies, each playing a crucial role in uncovering the truth:
- FTK Imager – Used for verifying forensic image integrity and extracting key artifacts.
- Autopsy – An open-source forensic tool that allowed me to analyze emails, files, and activity logs efficiently.
- ExifTool – A powerful metadata extraction tool that helped me uncover timestamps and GPS data from digital images and video files.
- GPXSee – Used for visualizing geolocation data and mapping out the suspect’s movements.
- Registry Explorer – Provided insights into system artifacts like login timestamps and software usage.
Each of these tools gave me hands-on experience with the core methodologies of digital forensics, reinforcing the importance of precision, integrity verification, and data correlation in investigations.
Although this is my only blog on digital forensics, the skills I gained in analyzing digital evidence, handling forensic images, and interpreting metadata will remain invaluable as I progress in my cybersecurity career.